Jul 2012
Panhard piston first batch delivered
Thursday 19 July 2012 Filed in: Panhard Piston
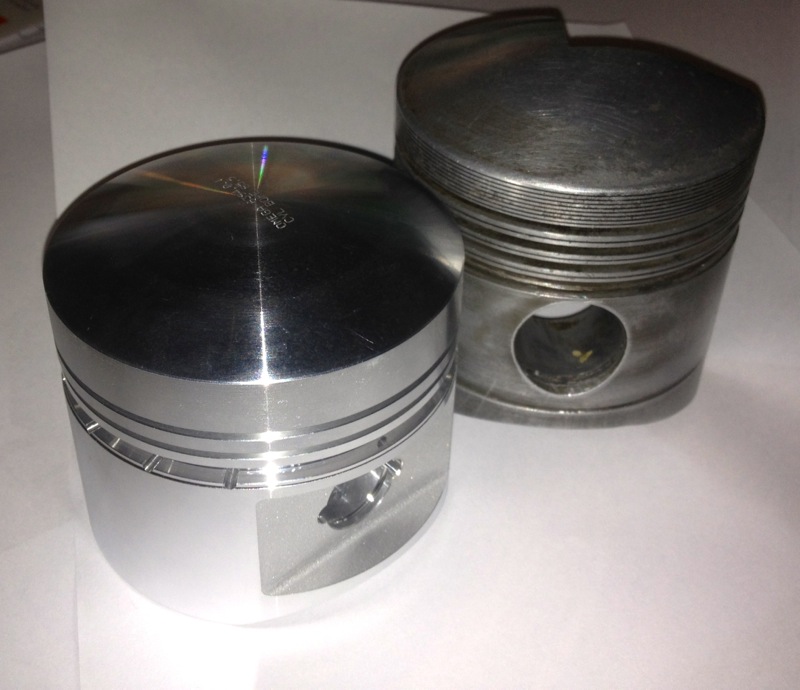
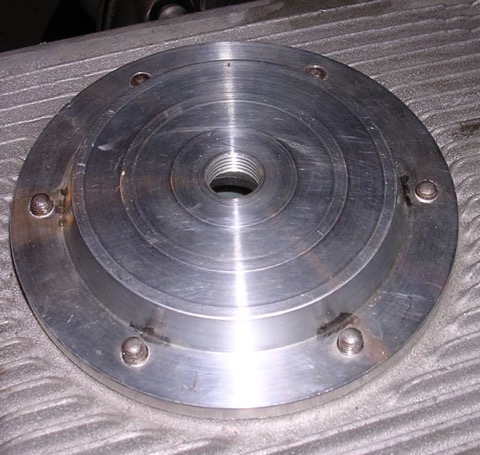
The pistons were delivered the other day, and here is the first picture of the bare piston, and below this another with the old piston for reference.
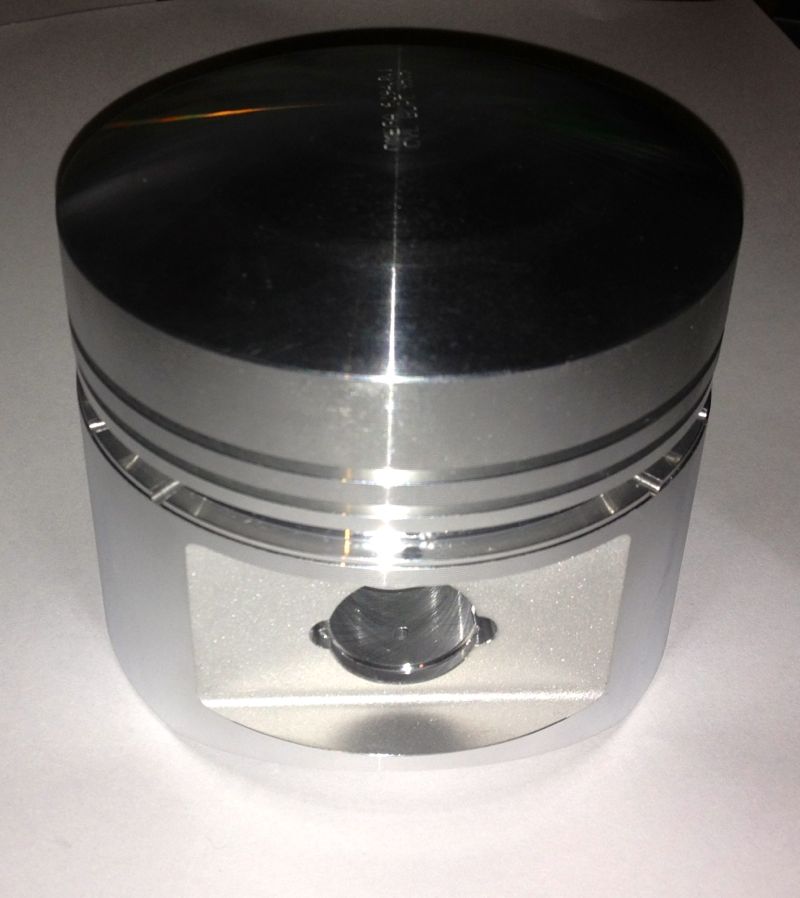
More pictures to follow, once I get back from my bike trip.
More pictures to follow, once I get back from my bike trip.
Comments
Panhard front pulley kit
Sunday 08 July 2012 Filed in: Panhard Parts
I sent a few links off to a few people and from their feedback and just to avoid any confusion, the new front pulley kit will only work with a revised seal arrangement. To update the seal you need to fit these components, which will be available assembled or as separate parts for future maintenance if required.
However, as the space available is limited within the OEM timing gear cover, the front pulley kit and the seal kit are designed to be an easy fit upgrade option, which is much the same philosophy as the filter kit upgrades, and an added bonus for those that are not removing the engine or doing additional works in this area. Initially fitting this kit might seem daunting at first, but it is really designed to be as foolproof as possible.
Obviously when the parts are made, I will post a video outlining the installations and use in situ photographs covering the assembly procedure.
ASSEMBLY PROCEDURE
First remove the old pulley after removing the fan and saving all the springs and wooden blocks. Leaving the timing gear cover in place, install the inner part of the pulley, which will consist of an aluminium centre and a steel inner ring already assembled together, engaging the key in the slot.
Next place the lightly oiled seal assembly, which will come ready assembled, over the timing gear front pulley aperture, and slide the seal over the inner ring until the steel ring is against the timing gear cover. The stainless steel ring should just be inside the opening, and now needs pressing into place.

Using the crankshaft front pulley bolt, and a spacer, press the seal assembly into position, by tightening the crankshaft bolt until the stainless steel seal adaptor is fully seated against the timing gear cover. The interference fit should be enough of an oil tight arrangement, but there is an O ring seal detail to make sure it is.
Remove the front pulley crankshaft bolt & spacer, and then place remaining part of the front pulley kit, which will be a sliding fit, into the steel inner ring. Next fit all the springs, wooden blocks, and other fan related parts and rebuild the fan assembly, not forgetting the V belt. Then refit the crankshaft pulley bolt and tighten to OEM torque figures.
Note, there is a dowel pin detail that aligns the front pulley in a set position, which will be used for those owners that want to fit a trigger wheel, whose primary purpose is to facilitate the use of third party ignition or modern engine management systems to their vehicle.
However, as the space available is limited within the OEM timing gear cover, the front pulley kit and the seal kit are designed to be an easy fit upgrade option, which is much the same philosophy as the filter kit upgrades, and an added bonus for those that are not removing the engine or doing additional works in this area. Initially fitting this kit might seem daunting at first, but it is really designed to be as foolproof as possible.
Obviously when the parts are made, I will post a video outlining the installations and use in situ photographs covering the assembly procedure.
ASSEMBLY PROCEDURE
First remove the old pulley after removing the fan and saving all the springs and wooden blocks. Leaving the timing gear cover in place, install the inner part of the pulley, which will consist of an aluminium centre and a steel inner ring already assembled together, engaging the key in the slot.
Next place the lightly oiled seal assembly, which will come ready assembled, over the timing gear front pulley aperture, and slide the seal over the inner ring until the steel ring is against the timing gear cover. The stainless steel ring should just be inside the opening, and now needs pressing into place.
Using the crankshaft front pulley bolt, and a spacer, press the seal assembly into position, by tightening the crankshaft bolt until the stainless steel seal adaptor is fully seated against the timing gear cover. The interference fit should be enough of an oil tight arrangement, but there is an O ring seal detail to make sure it is.
Remove the front pulley crankshaft bolt & spacer, and then place remaining part of the front pulley kit, which will be a sliding fit, into the steel inner ring. Next fit all the springs, wooden blocks, and other fan related parts and rebuild the fan assembly, not forgetting the V belt. Then refit the crankshaft pulley bolt and tighten to OEM torque figures.
Note, there is a dowel pin detail that aligns the front pulley in a set position, which will be used for those owners that want to fit a trigger wheel, whose primary purpose is to facilitate the use of third party ignition or modern engine management systems to their vehicle.
Panhard crankshaft pulley with trigger wheel (updated)
Friday 06 July 2012 Filed in: Panhard Parts
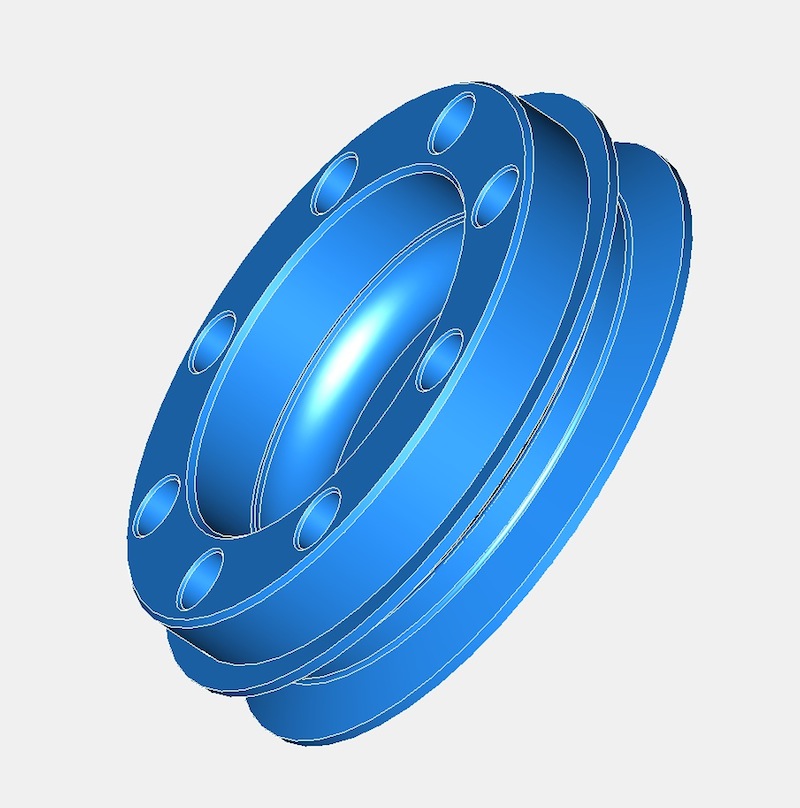
I have updated the CAD drawing to reflect my latest thoughts. I was looking for some oil pump parts and I came across a bag of Viton single lipped seals, which I recognised as some potential front pulley piston ring alternatives I bought five years ago. These seals were bought, as a continuation of the work I did with the rear bearing support seal adaptors, as I always intended to do away with the piston ring seals at either end of the crankshaft. I only made a few of these rear bearing adaptors, and I personally fitted a couple, and then sent some to the Netherlands, as well as a drawing to Germany.
There isn’t a seal that will fit directly into the timing gear cover, as it is a peculiar & unique diameter, so the idea back then was to make a carrier for the seal that would interface into the existing timing gear cover (same idea as the rear system I designed), which had the added bonus of not damaging the OEM timing cover too.This approach does mean a new front pulley assembly will be required, but this is in line with my philosophy of not damaging OEM stock when creating modified components. All the wearing surfaces are also easily replaced in years to come, and readily sourced, plus this system can recover worn timing covers.
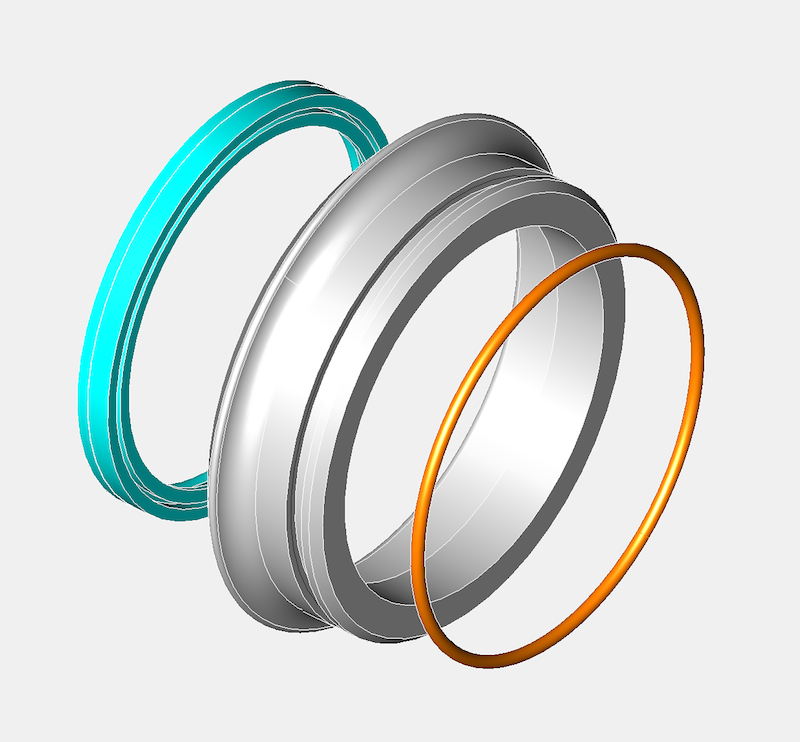
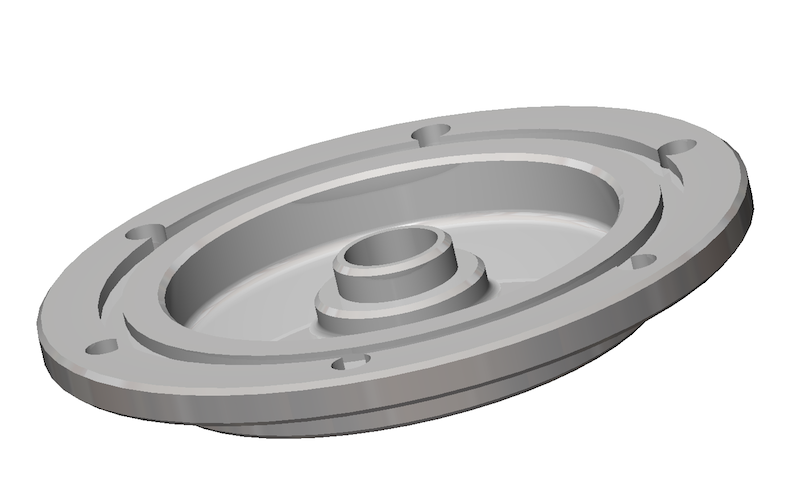
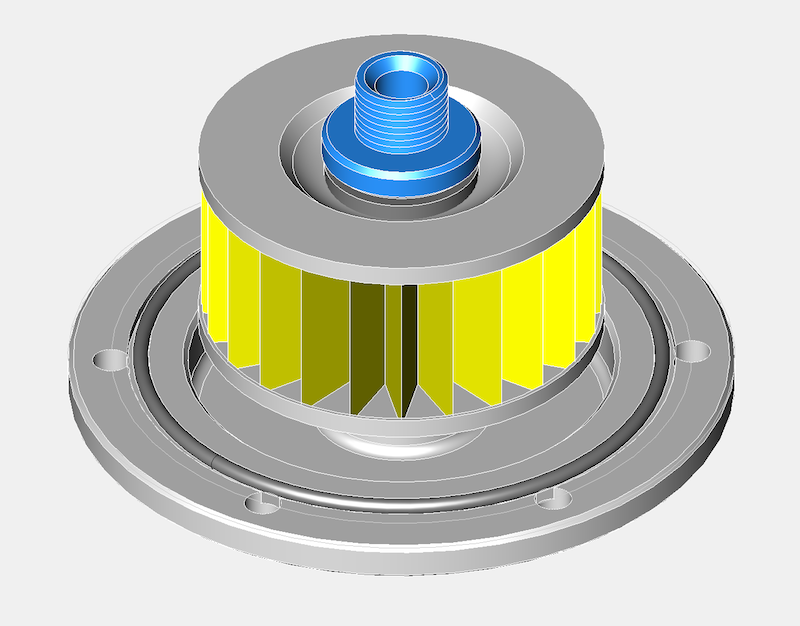
Today, I managed to get the timing gear cover seal diameter surfaces measured on a Elaton Coordinate Measuring Machine, so I now have a very precise idea of what diameter I need to make the new part so that it has a nice interference fit. This is the complete crankshaft conversion kit assembly pictured below.
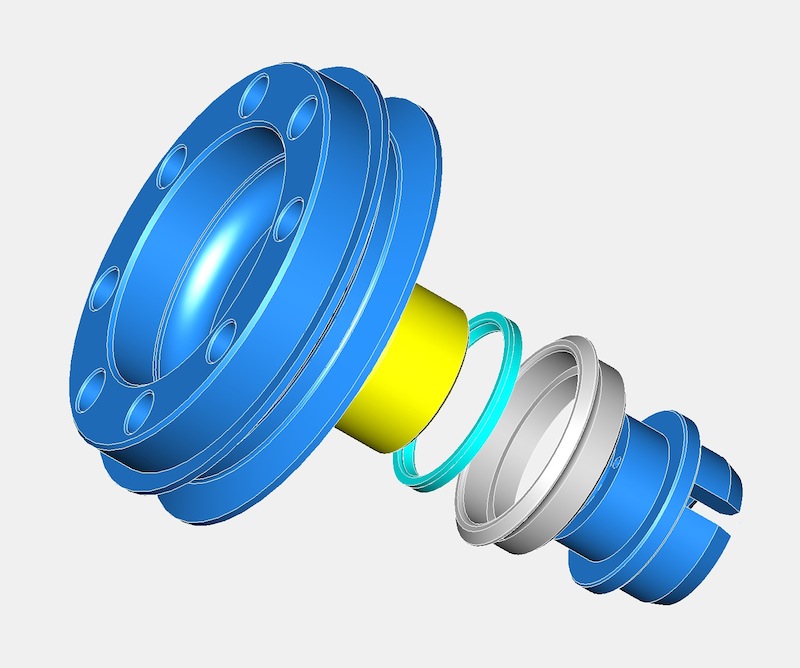
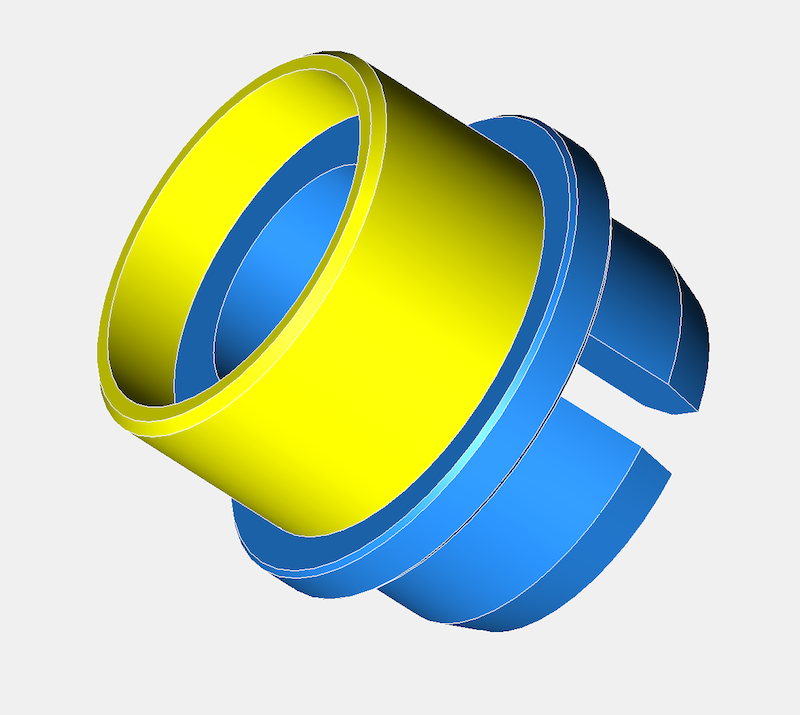
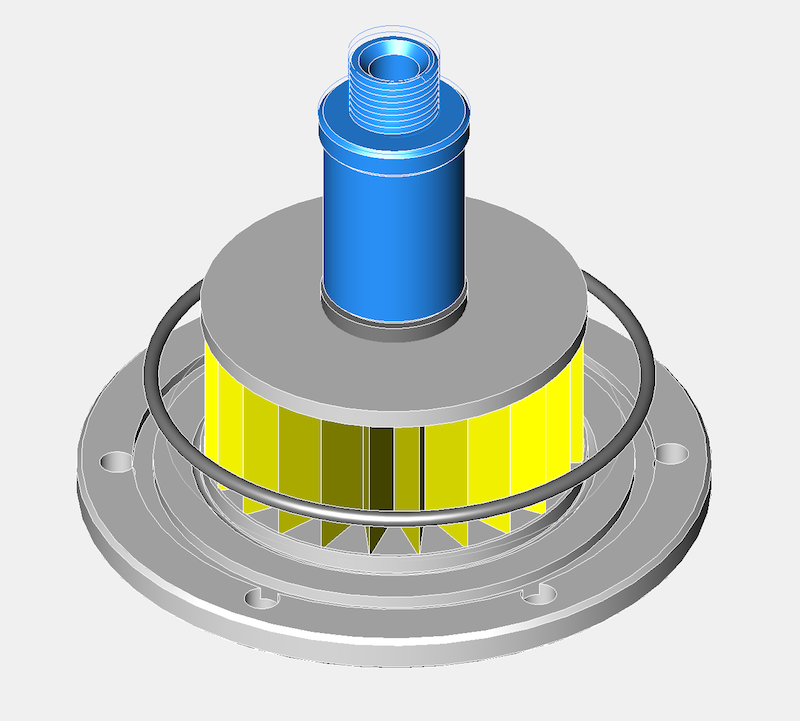
The grey part is the stainless steel seal carrier, and the cyan part the Viton seal. The yellow part is the steel inner ring, which is easily renewed if required, with the blue parts being the aluminium two piece front pulley components. These are located with a small dowel pin, however the parts are held together by the main front pulley crankshaft bolt.
It is necessary to make the parts this way to allow for DIY installations by Panhard owners, and it will be relatively straight forward to fit the conversion kit.
The picture below shows the optional trigger wheel version, which is needed by modern ignition or engine management systems, but fitting these is not for the faint hearted!
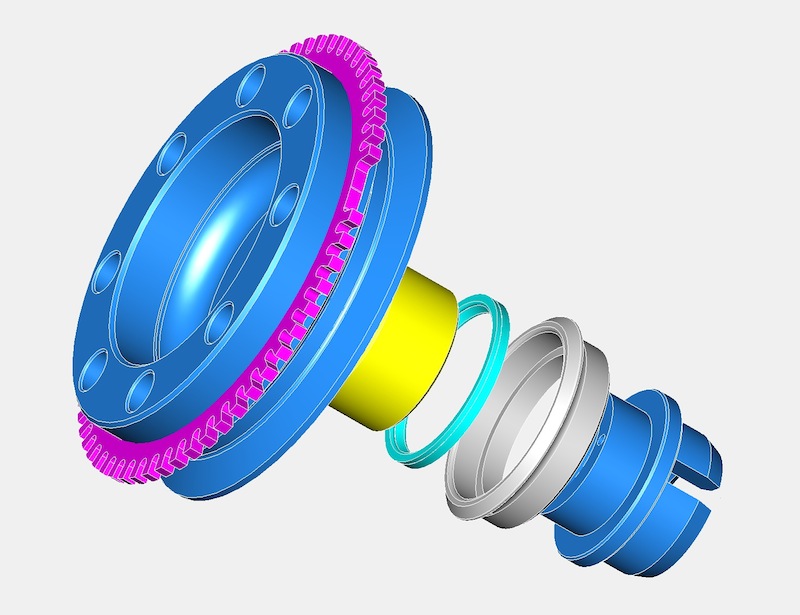

There are different tooth patterns available, but the one in the picture above is a 60-2 trigger wheel, commonly used by Bosch for VAG engines.
There isn’t a seal that will fit directly into the timing gear cover, as it is a peculiar & unique diameter, so the idea back then was to make a carrier for the seal that would interface into the existing timing gear cover (same idea as the rear system I designed), which had the added bonus of not damaging the OEM timing cover too.This approach does mean a new front pulley assembly will be required, but this is in line with my philosophy of not damaging OEM stock when creating modified components. All the wearing surfaces are also easily replaced in years to come, and readily sourced, plus this system can recover worn timing covers.
Today, I managed to get the timing gear cover seal diameter surfaces measured on a Elaton Coordinate Measuring Machine, so I now have a very precise idea of what diameter I need to make the new part so that it has a nice interference fit. This is the complete crankshaft conversion kit assembly pictured below.
The grey part is the stainless steel seal carrier, and the cyan part the Viton seal. The yellow part is the steel inner ring, which is easily renewed if required, with the blue parts being the aluminium two piece front pulley components. These are located with a small dowel pin, however the parts are held together by the main front pulley crankshaft bolt.
It is necessary to make the parts this way to allow for DIY installations by Panhard owners, and it will be relatively straight forward to fit the conversion kit.
The picture below shows the optional trigger wheel version, which is needed by modern ignition or engine management systems, but fitting these is not for the faint hearted!
There are different tooth patterns available, but the one in the picture above is a 60-2 trigger wheel, commonly used by Bosch for VAG engines.
Panhard oil filter variants
Sunday 01 July 2012 Filed in: Panhard Oil
I was updating a few pages and noticed that one of the oil filter prototypes was wrongly labelled. I was doing a retrospective update after finding some photos on another MacBook, when something didn’t add up, and it turned out that I’d been investigating an internal filter variant, as the modified Renault Purflux filters were being discontinued. At this point in time, there were not many alternatives out there, so I was experimenting with internal paper cartridge filters, that I had seen in a local motor factor, and I made a prototype based on my original baseplate.
However with hindsight, it was a red herring, because a few weeks later I found a Mann Hummel external filter, that was better than the Purflux derived Renault unit, but the internal solution still has merit, especially in a double sump increased oil capacity format, which is a necessity to reduce the engine oil temperatures and increase the oil quality.
After looking at this some more, I have decided to remanufacture this variant, as it offers a different solution for the factory Panhard car, and can be used with double sump versions too. It does not hang down as far as the cartridge, which is important because the ground clearance under the engine is reduced by 50mm after fitting the factory double sump. The actual ground clearance doesn’t change however, but fitting a sump or a cartridge filter appears to lower it in some peoples’ eyes.
Further plus points are, a magnetic sump plug can also be incorporated into the sump plate if required, the filter is freely available from motor factors in Europe, and the oil filter cartridge doesn’t need to be modified, which simplifies things further for the less dextrous. Technically it’s also easier for people to understand, as the paper filter is a straight swap for the original mesh filter, although the low flow rate & low pressure drop through a paper element principle still applies.
Latest CAD shown below, but it’s work in progress.
As I have been looking at the double sump variant for Brian Osbourne’s latest engine, it’s logical to try and use some of this for the next generation solution. I don’t have a double pump available at the moment, otherwise I would check whether I could use this new sump plate for the internal filter version with the double pump double sump application. I do know somebody with one, so I am going to take an internal filter and sump plate to their engine and see what is required, but it will have to wait until after the International Citröen Car Club 2012 Rally at Harrogate.
Latest thoughts in CAD for the double sump version, but only using the original oil pump, which is more than adequate assuming the crankcase oil circuits are modified. This version has a different pick up pipe and a flat not dished sump plate, so it will need two new parts.
