Feb 2012
Panhard crankcase oil gallery modifications
28/02/12 21:03 Filed in: Panhard Engine
This is the cleaned crankcase marked up and ready for the knife or Foredom.
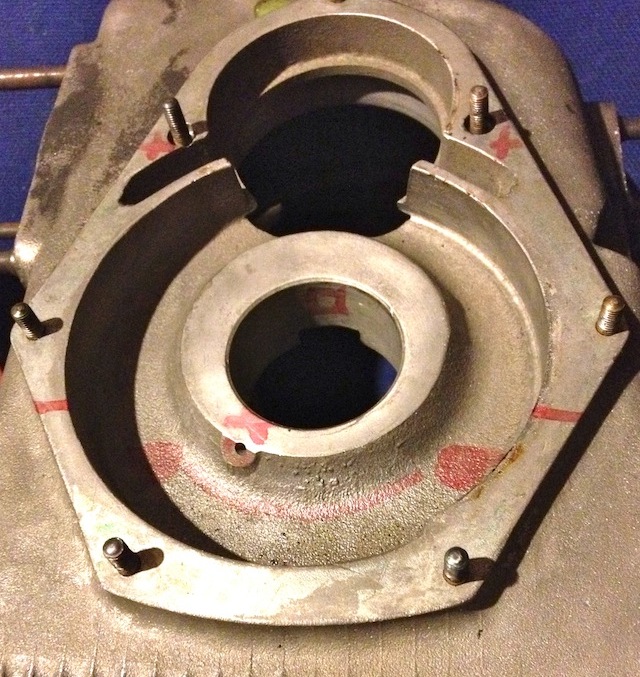
I have to modify the later style crankcase to adjust the oil circulation. This will mean creating a new big end feed under the front main bearing, plugging some of the existing galleries, and making new drain holes for the front timing gear. This will reduce pumping losses, lower oil temperatures and improve oil quality. After this I will be refining the existing oil galleries to reduce back pressure and cavitation, so increasing the nett flow rate of the existing oil pump.
Contrary to what others are saying or you might have heard elsewhere, this oil pump is more than capable of feeding the demands of the Panhard engine, and these mods to the front end boost pressure to the plain bearing surfaces, especially when combined with my camshaft oil light piston, so it’s a win win situation, but if I was going to spend money on something extra to improve things further, I would boost the oil capacity by increasing the sump volume.
Please note no Panhard oil pumps are destroyed making this modification.
Comments
Panhard oil filter baseplate wearing well
28/02/12 18:44 Filed in: Panhard Engine
I had to remove the oil filter kit on this engine, so I could heat the crankcase up to remove the front main bearing, and begin the oil gallery modification.
On stripping the oil pump out, I was surprised to see a slightly lopsided wear pattern to the cam driven oil pump rotor, but this suggests there is a slight bit of play in the oil pump shaft, as it’s a reaction against the thrust forces produced by the gears meshing at the camshaft drive.
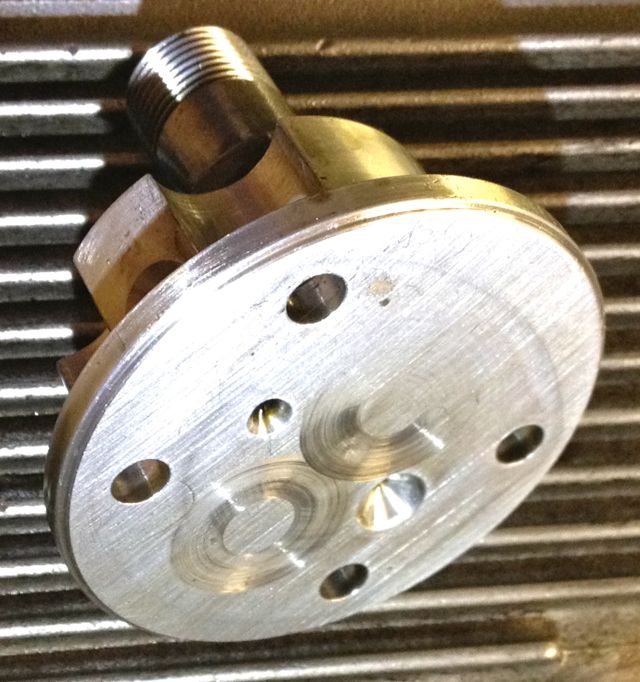
One big positive is how fine the scratching is to the baseplate surface, where the steel gears rub against the aluminium. That is a good sign the filtration is working, as I’d normally expect to see heavier scoring, if an original mesh strainer was fitted.
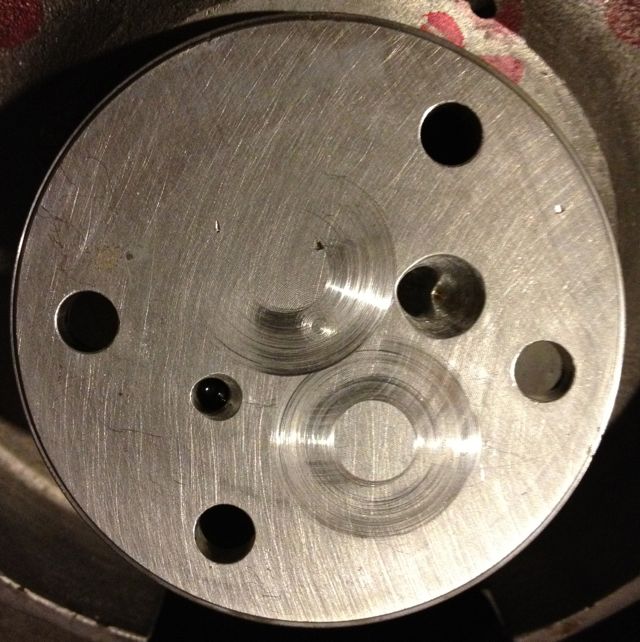
On stripping the oil pump out, I was surprised to see a slightly lopsided wear pattern to the cam driven oil pump rotor, but this suggests there is a slight bit of play in the oil pump shaft, as it’s a reaction against the thrust forces produced by the gears meshing at the camshaft drive.

One big positive is how fine the scratching is to the baseplate surface, where the steel gears rub against the aluminium. That is a good sign the filtration is working, as I’d normally expect to see heavier scoring, if an original mesh strainer was fitted.

Panhard crankcase stripped
28/02/12 12:37 Filed in: Panhard Engine
The engine is up North ready to go under the knife, but prior to this when it was stripped down, it had a broken piston ring, extensive blowback on the other cylinder bore a piston crown running hot, and a connecting rod hitting the crank web. The rear crankshaft web had been pulled apart slightly, and it looked like some metal component had caused this, because there was impact damage to the middle web between the web and rod.
The ring that was broken was still in the piston groove, and the bits sort of added up when placed together. On inspecting the crankcase today, as I was removing the oil pump, but prior to removing the front bearing I saw these metallic components within.
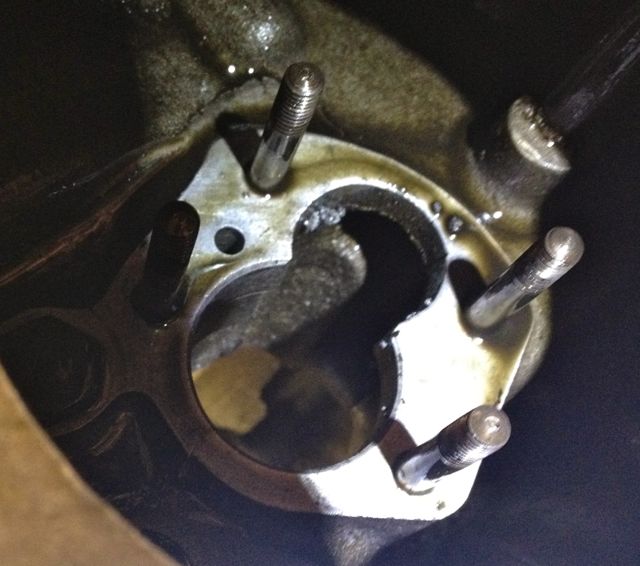
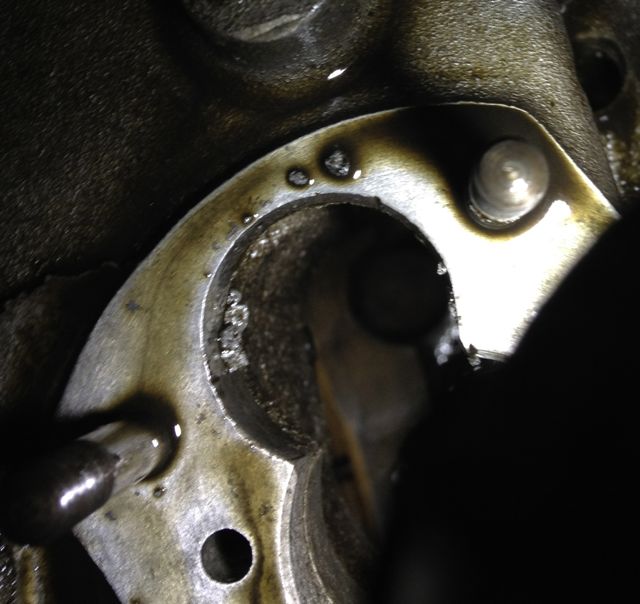
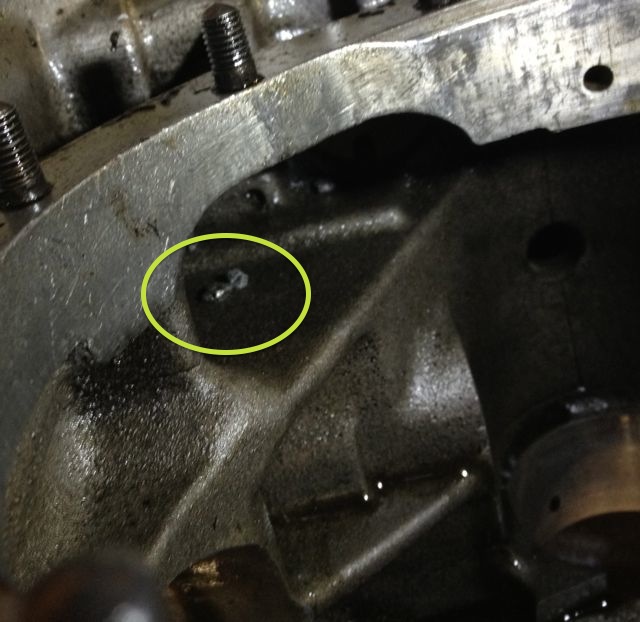
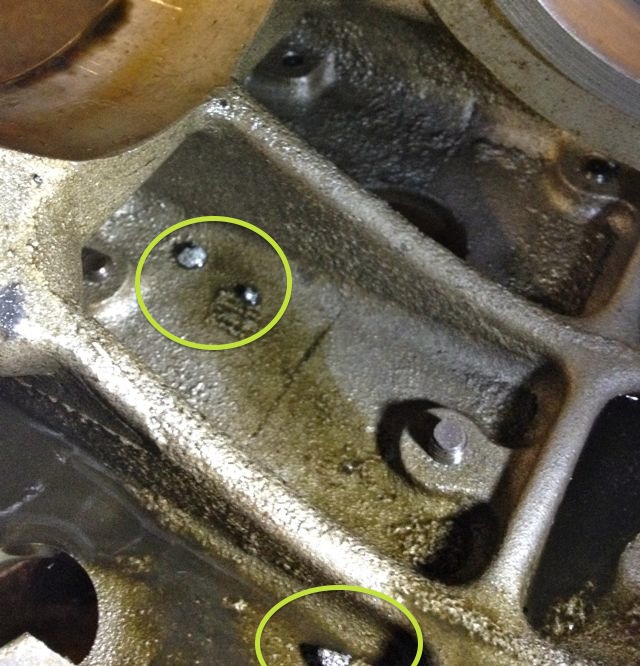
I’ll need to check the pistons and cylinders more closely and try and ascertain what this stuff is!
The ring that was broken was still in the piston groove, and the bits sort of added up when placed together. On inspecting the crankcase today, as I was removing the oil pump, but prior to removing the front bearing I saw these metallic components within.


I’ll need to check the pistons and cylinders more closely and try and ascertain what this stuff is!
New front pulley
26/02/12 15:19 Filed in: Panhard Engine
I have made several distributor based electronic ignition prototypes over the years, and although cost effective, they all have a lack of precision, because they run through the existing drive mechanisms, which are a slotted drive on the end of a geared oil pump, which is powered by another gear on the gear driven camshaft.
Ultimately I need to fit a crankshaft timing trigger to this engine, as part of the ongoing ignition & fuelling developments, and the traditional locations for these are the flywheel or front pulley. If I want to gear this up for retrospective and easy fitment, the flywheel really is out of the question, because this is an engine out exercise in a Panhard, and that is a no brainer.
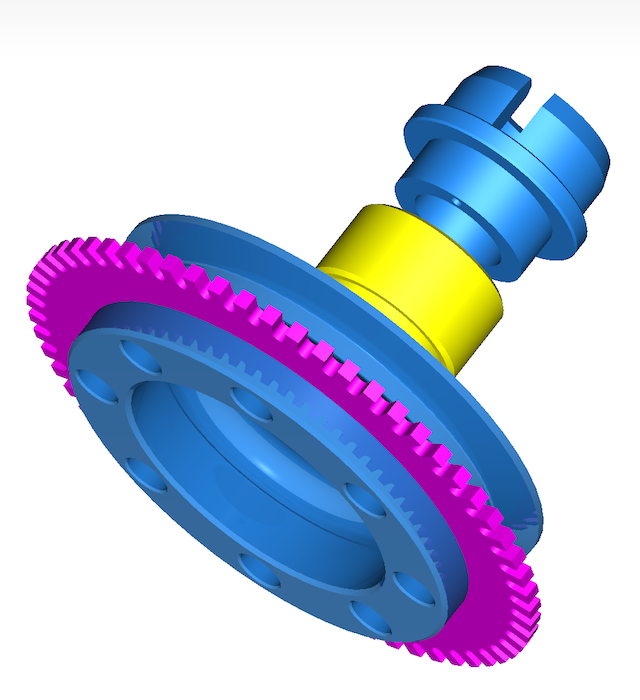
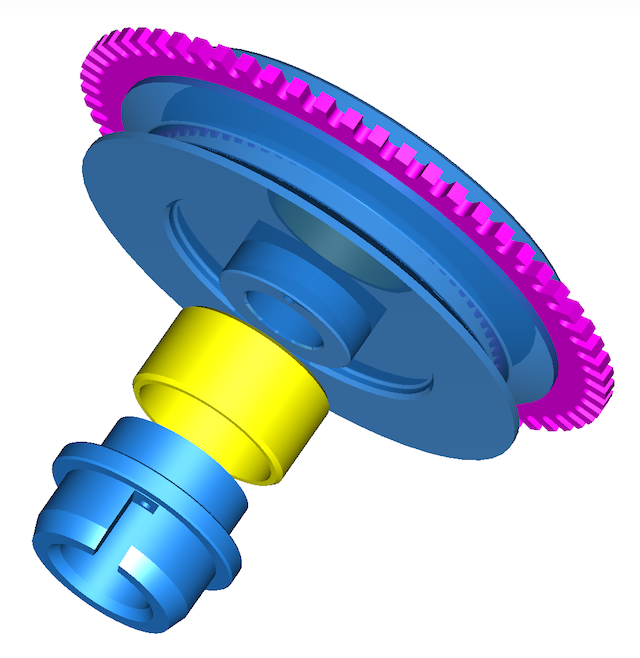
That now means the front pulley arrangement has the most potential, and that is what the majority of modern car manufacturers use anyway. Although it is possible to add a trigger wheel to the existing pulley, like I have done in my bench testing to date, there is a slight variance in sizes that negates this. It’s my philosophy to always make new parts wherever possible, so that old ones don’t get destroyed unnecessarily. At the same time there might be other design changes or benefits you can bring to this area, so for example I can incorporate a modern oil seal, assuming you tweak the timing gear casing, and also make the pulley rebuildable. If this is not to your liking, and you want to keep the OEM piston ring seal the design can be modified to accommodate this too, by replacing the yellow part for another.
Latest CAD thoughts are pictured below, and the pulley now has a renewable inner ring shown in yellow, which acts as a running surface for the double lipped oil seal. The aluminium parts in blue now have a location dowel for timing purposes. The trigger wheel shown in purple is also a standard 60-2 pattern, which gives improved triggering over the lesser toothed versions I was experimenting with.
Next up, look at the VR sensor support bracket, chase up the pistons, and hopefully acquire a boring machine.
Ultimately I need to fit a crankshaft timing trigger to this engine, as part of the ongoing ignition & fuelling developments, and the traditional locations for these are the flywheel or front pulley. If I want to gear this up for retrospective and easy fitment, the flywheel really is out of the question, because this is an engine out exercise in a Panhard, and that is a no brainer.
That now means the front pulley arrangement has the most potential, and that is what the majority of modern car manufacturers use anyway. Although it is possible to add a trigger wheel to the existing pulley, like I have done in my bench testing to date, there is a slight variance in sizes that negates this. It’s my philosophy to always make new parts wherever possible, so that old ones don’t get destroyed unnecessarily. At the same time there might be other design changes or benefits you can bring to this area, so for example I can incorporate a modern oil seal, assuming you tweak the timing gear casing, and also make the pulley rebuildable. If this is not to your liking, and you want to keep the OEM piston ring seal the design can be modified to accommodate this too, by replacing the yellow part for another.
Latest CAD thoughts are pictured below, and the pulley now has a renewable inner ring shown in yellow, which acts as a running surface for the double lipped oil seal. The aluminium parts in blue now have a location dowel for timing purposes. The trigger wheel shown in purple is also a standard 60-2 pattern, which gives improved triggering over the lesser toothed versions I was experimenting with.


Next up, look at the VR sensor support bracket, chase up the pistons, and hopefully acquire a boring machine.
Revised flywheel
26/02/12 10:06 Filed in: Panhard Engine
Here are the before and after pics for the flywheel.
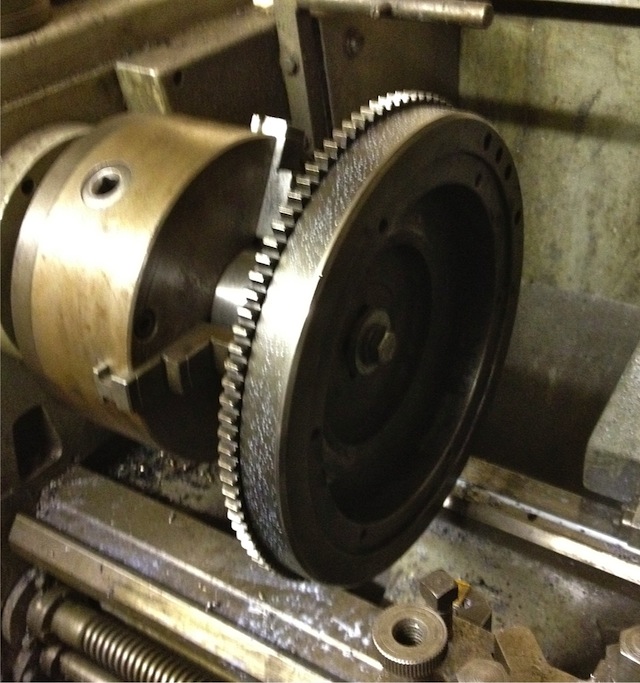
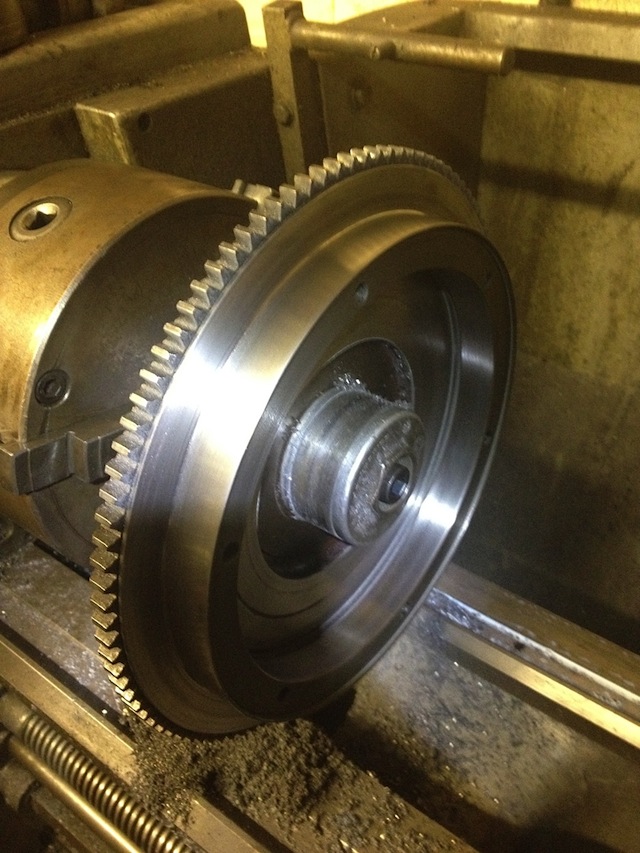
Obviously it can go lighter, but it’s about 5.9kg from around 8kgs originally. This is a good 25% lighter, and the inertia reduction will be even higher.


Obviously it can go lighter, but it’s about 5.9kg from around 8kgs originally. This is a good 25% lighter, and the inertia reduction will be even higher.
Introduction
05/02/12 10:03 Filed in: Panhard Engine
I never thought I’d be doing another one of these again, but a good friend was in a spot of bother with his Panhard engine, so I decided to have a look at it.
After stripping the engine down, there were quite a few issues, and the source of the shuffling noise was discovered, but it won’t come back! I will edit this blog when I have time to post the observations and collate some pictures.
The engine had been fitted with one of my oil filter conversion kits after its last rebuild, and at the same time it had an aluminium camshaft gear fitted.
The list of jobs for this engine,
Remove mass & inertia from OEM flywheel
Revise crankcase oil circuits, as it is the later crankcase design, which relies on the camshaft gear to splash lubricate the front main bearing and big end.
New oil seals to front and rear main bearings
Make new front pulley for new crankshaft trigger wheel and MicroSquirt ignition system
Revise porting to cylinder head area, with possible twin plug conversion
Rebore cylinders with new bespoke high compression pistons
Rebuild the valve gear bushes
Improve crankcase breather
Improve air filtration
Improve oil cooling
Some of these will be a continuing test bed for past improvements, but the new ones are the pistons and cylinder reboring, the new oil seal detail to the front timing cover, and the new front pulley to take the trigger wheel.
